Sunday, November 27, 2016

Amazing Polymer Clay

With the holidays upon us I am seeing lots of cute ornament ideas on Pinterest. So today I thought I would share one of my favorite ornament making mediums- polymer clay. In case you have never heard of it, it is a "clay" that stays malleable until baked in the oven. Once baked its becomes a semi-flexible, but sturdy plastic. Here are a few ornaments I have made using it.


There are several different brand brands and lots of colors to choose from. I usually use Sculpey or Fimo, because they are readily available at my local craft stores.
The colored blocks are small, 2oz, but one block can go a long way.  If you are making a large project or want to paint it yourself, Sculpey sells a large 1lb package of white.  The Sculpey website,  is a great resource for tips and project ideas.
As you can see, I've been playing with this big block! I love these big white blocks for kids hand print ornaments.  I have aggravated my nephew on a couple occasions trying to get him do multiple hand prints for Santa ornaments! In the end, he was really excited to give them to his grandparents and tell them how he made them. Once baked the clay can be painted and since it turns into a firm plastic they last really well even if dropped! Here are his Santa ornaments we made. Little hands are so cute!
Even the more intricate ones are pretty durable and if a piece does break off its easily fixed with super glue (ask me how I know lol).  Another good thing about polymer clay is that it doesn't take much to get started you can probably find most sculpting tools around the house. Just be sure to have clay dedicated tools, meaning don't use your good pan to bake the clay in then plan on using that same pan  to bake cookies. That's a big no-no! When I started doing more clay work I even invested in a toaster oven just for baking clay so I wasn't scrubbing down my oven after every clay baking session. I may seem overly cautious but I didn't like the thought of any plastic residue being in there and it never hurts to have a clean oven! I also like to keep some baby wipes handy to clean my hands between color changes. I will leave you with one final picture of a polymer clay item I made and was super proud of.
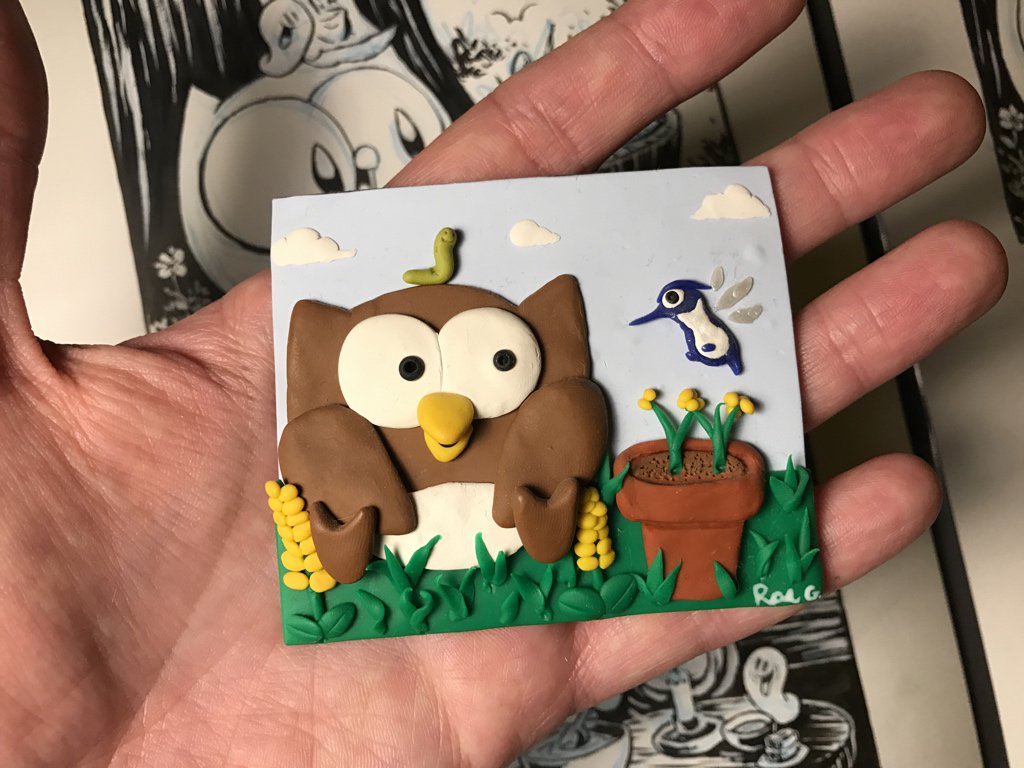
I made this for Andy Runton the creator of Owly; an adorable comic about a little owl and his friend wormy. Here is a link to his site because I know you will want to see more of this adorable little owl! http://www.andyrunton.com/ This was a piece of fan art I made and gave to him at a comic book convention over 10 years ago! So proof that it holds up well, but more importantly you can even make new friends with polymer clay! Thanks again Andy for the picture!

Wednesday, November 23, 2016

Tina Belcher Feltie

Today I though I would share one of my favorite crafting materials- felt. I love working with felt!!  It is inexpensive, super easy to work with, and best of all doesn't fray.  The possibilities with this stuff are endless! Usually I make ornaments or small figures but last week I decided to take it to a new level and make some fan art.  So here it is! My feltie Tina Belcher from the Fox tv show Bob's Burgers. I love this show, it's hilarious!
I uploaded it to Twitter last Friday but I forgot to give Tina her signature yellow hair clip. I cant believe I did that. In the words of Tina "uuuuhhhh!" I must have been too excited when I finished stitching her glasses and forgot about it. That's ok though it was an easy fix and you guys get to see the corrected picture.  If you're a Bob's Burgers fan like I am keep checking back, I have a few more ideas in the works!


Wednesday, November 16, 2016

Ink Stain Removal

Today I though I would share a tip for removing ink stains. The other day my husband had an ink pen leak in his pocket.
We both thought these pants were a lost cause, but me being me I thought I would try to salvage them. I remembered reading that ink could be removed using alcohol and a quick google search confirmed this, but also said it depended on the type of ink pen. Well that pen was long gone so who knows what kind it was ,but again what did I have to lose.  So I got some cotton swabs and alcohol and had at it!
It was definitely doing something even if it was just making the stain bigger! If you try this make sure to have something behind the stain to absorb the ink because it does run!  I got a few ink blots on the inside pocket before I realized what happened. I ended up using a paper towel in front of a plastic baggie just to make sure I wasn't transferring the stain somewhere else. I just kept dabbing on alcohol and blotting it with paper towels.
It was getting lighter but still not good enough. So I poured a cupful of alcohol on it and let it set about 5 minutes then blotted again and let it dry.
Much better but still there.  Not wanting to give up I decided I would give it one last try so again I dabbed on alcohol and blotted with a clean paper towel and let dry.  And it worked!!!!
I couldn't believe it but it got the ink out! Not sure if it works on other fabrics or with all pens but these cotton khakis are good as new. If we have another mishap on a different fabric I will definitely give this a try and report back!


Thursday, November 10, 2016

Equilateral Triangle Quilt Part 4- Finished Quilt Top

My apologies for the delay with the tutorial.  I was in England, and yes I had a wonderful time! I will have some blog posts about the trip and my crafting adventures there in upcoming posts.  For now lets finish up this quilt top!

So picking up where I last left off I finished sewing all of my rows together and pressing them.
This is the back to show you how I pressed each row in alternating directions.


Then I began sewing the rows together making pairs.
Remember how I said I alternated which direction I pressed my seams? This is where that comes into play.  When the edges are lined up for sewing the intersecting seams just nest together against each other.
If you managed to keep a consistent seam allowance during the piecing of the rows, and did a good job pressing and nesting your seams your finished quilt will show it.  Look at those intersecting points!


Keep sewing the rows together until your quilt top is complete.  Then step back and enjoy your beautiful work!

So what do you think?  I will admit the triangles may be a bit challenging if this is your first quilt, or even your second. I had to rip out a few seams myself and I have been sewing for years, it happens.   However, if you are patient, think about each step as you go along and pay attention to your seam allowances you can do it! As always questions, comments and sewing tips are always welcome and appreciated!